
2650 Emulator
What this is
This page contains an emulator for the Signetics 2650 microprocessor which you can download and run on your own computer.
The Signetics 2650 is an 8-bit microprocessor originally released in the 1970's. This being some years before the advent of the IBM PC there wasn't a ready platform available to support development.
Microprocessor manufacturers at the time instead sold or provided "development boards" which were basic circuit boards containing their microprocessor and enough support chips and memory for it to run in a minimal way. There'd also be some space on the board to add your own chips and circuitry for whatever application you were developing. Typically there'd also be a very small amount of RAM plus a small amount of ROM (Read Only Memory) running what was generically called a "monitor". This monitor allowed the user to connect a serial terminal to the circuit board and enter very basic commands (such as load, display, set memory, run, etc.). Just enough to make it run.
Anyway, back in the day (late 1970's) I had one of these development boards, a PC1001, from Signetics for the 2650. Its monitor in ROM was called PIPBUG. The physical board itself is long dead now, but attached to this page is a compressed tar file containing a Tcl/Tk emulation of it and the 2650 written by me in 2005. Tcl is a scripting language which is widely available and downloadable for a variety of operating systems and architectures. Tk is a graphical extension package for Tcl.
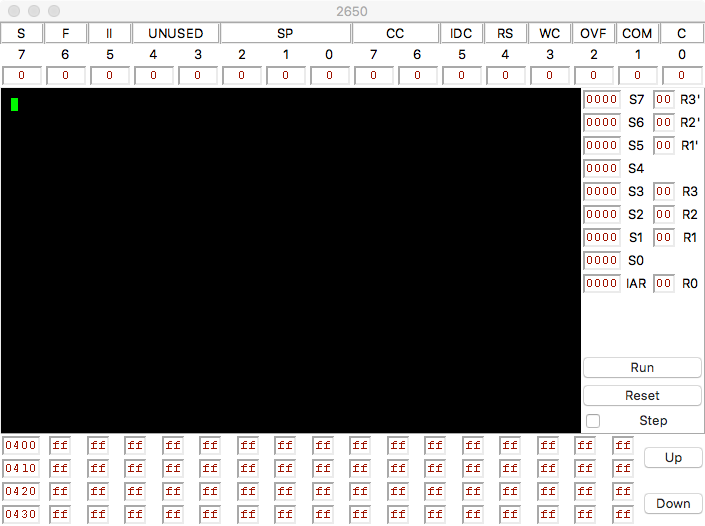
Untar the file in a directory and run ./2650 -f in the directory. You will need to have Tcl/Tk installed, obviously. If this command doesn't work, try wish 2650 -f, still in the directory where you untarred the files. You should get something like this:
A bit more about the 2650 and this emulation
The 2650 is, as mentioned, an 8-bit microprocessor. You can find out more about it on Wikipedia here, including details about its instruction set.
The emulator displays the value of all of the 2650's registers and memory. These update in real-time when the emulator is running (which it will start to do when you click the "Run" button).
The large black rectangle in the emulation is the screen of a serial terminal emulator built in to the emulator.
Across the top of the emulator window is the 2650's Program Status Word (PSW) displayed as individual bits. This includes the Stack Pointer (SP) which, on a 2650, refers to the built-in 8-level stack (displayed to the right of the terminal window: registers S0 - S7), arithmetic results flags (carry, sign, etc.) and so on.
In the same region of the display as the 8-level stack are displayed the general purpose registers R0 - R3 and the alternate registers R1' to R3' (these latter commonly used in interrupt service routines). R0 might also be called the accumulator.
IAR is the Instruction Address Register and shows the address of the instruction being (or about to be) executed. It will change very rapidly when the emulation is running. Execution after reset on a 2650 starts at 0x0000.
At the bottom of the emulator window are displayed the contents of memory. Initially the emulator shows the start of RAM at 0x0400. 0x000 - 0x03ff is used by ROM (PIPBUG, 1 kilobyte). This display also updates in real time when the emulator is running.
If you run the emulator without the "-f" flag the majority of the GUI is not displayed. Only the terminal emulator screen and a reset button appear and the emulator will start running straight away.
About PIPBUG
PIPBUG is the in-ROM monitor software supplied by Signetics as part of the development board.
It is very basic. When it starts it displays a single asterisk ('*') as a prompt and then waits for commands from the user.
Below is a link to a copy of the original PIPBUG documentation on archive.org:
Commands are single letters followed by parameters. All letters must be in upper case (including hexadecimal digits). Don't type too fast because the development board doesn't do buffering and anything you type-ahead will be lost.
Here's a little piece of code to write the letter 'A' to the console:
0438 04 41    LODI,r0 0x41    # Store the code for the character in register R0
043a 3f 02 b4 BSTA,UN COUT    # Call the COUT subroutine in PIPBUG to output it
043d 1f 00 22 BCTA,UN MBUG    # Return control to PIPBUG
In the snapshot below you can see me entering it (at address 0x0438) and then running it (the 'G' command). Note that at the end of each line entering the code you have to press CTRL-J except for the last where you press RETURN.
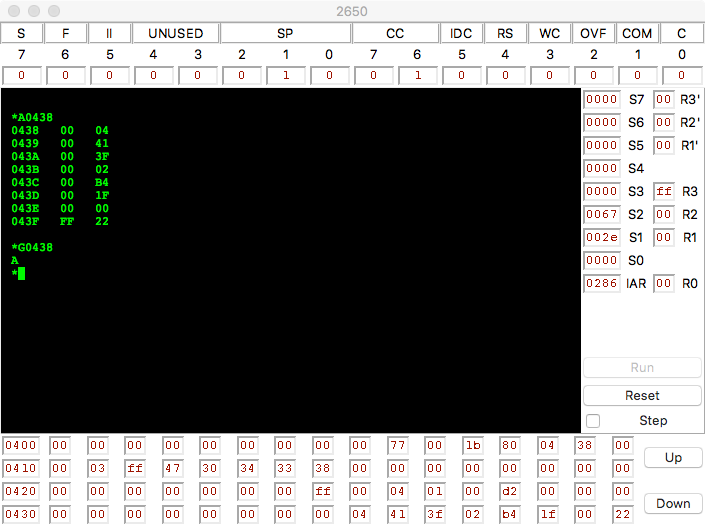
You can also see the 8 bytes of code I entered in the memory display, starting at 0x0438, at the bottom of the emulator window.
Wrap up
Yes. I know it's painful to use compared to what we have these days. But this was 40 years ago and the bar to getting into any sort of development work with computers - whether mainframe, mini or micro - was very high.
Indeed, there wasn't any expectation that you could do anything useful directly with a development board. You had to have other infrastructure, such as your own minicomputer or mainframe, to do some of the heavy work for you.
The arrangement would typically be something like this:
- You'd have the development board connected via a serial cable to a teletype - this was an electromechanical device with a keyboard and mechanical typewriter output (see article on Wikiedia here). Typing on the keyboard would send characters to the development board and any characters it sent back would be typed onto by the typewriter onto a paper roll, fan-fold paper or sheets. The device would also have had a paper tape reader and what was on paper tape could be sent to the development board in place of keystrokes.
- You'd have a mini or mainframe computer which would run a 2650 Assember. This software would come from Signetics.
- You'd write your 2650 assember code, maybe onto (punch cards (Wikipedia), feed it into the assember program which would then produce the 2650 machine language result and punch it onto paper tape.
- You'd take the paper tape over to the teletype, tell PIPBUG to load it (using the 'L' command), start the paper tape reader then, when the load is finished, use the 'G' command to run your code on the development board.
- Any bugs or changes required? Update your stack of punch cards and go back to step 3.
As I said, painful compared to what we have today. But it was the start.